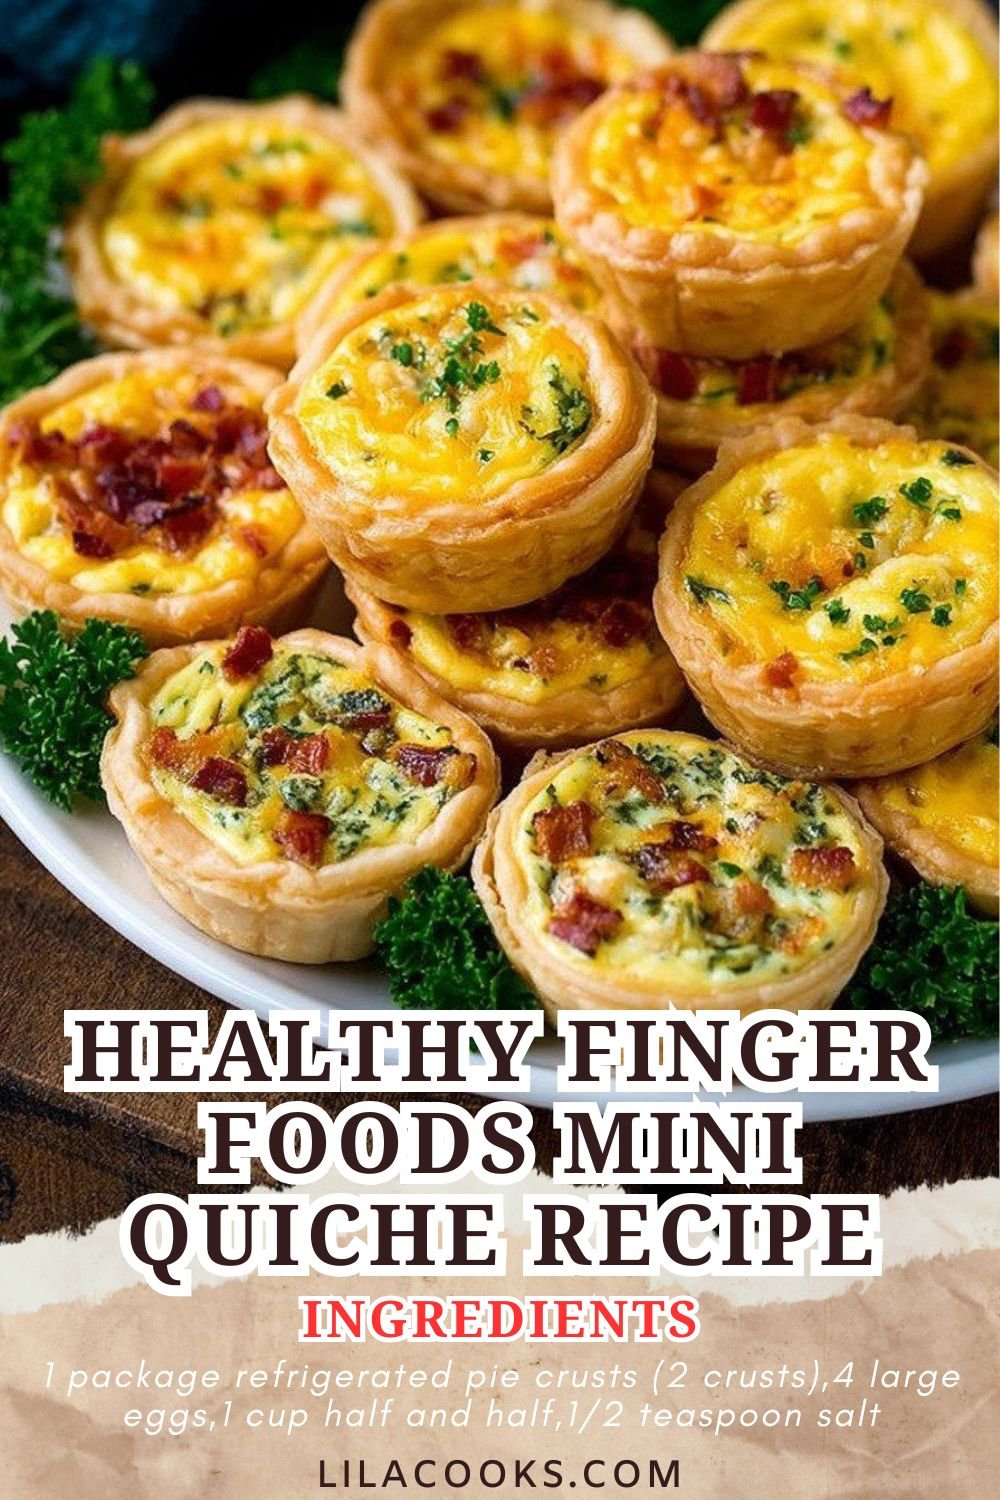
I’ve always had a soft spot for little bites that pack a big punch, and this mini quiche recipe fits that bill perfectly. These healthy quiche recipes are the kind of snacks that make you feel like you’re winning at both life and lunch. We’re talking flaky crusts, fluffy eggs, and fillings that you can tweak depending on your mood. One day it’s classic ham and cheese, the next it’s spinach and mushroom. And guess what? They freeze like a dream, so you can stash them away for later and feel like a meal-prep genius. When I set these out at gatherings, they disappear faster than I can say ‘who wants seconds?’ Which makes sense—they’re healthy finger foods party favorites. Something about having your own personal little quiche just makes people smile. I mean, who doesn’t love finger foods appetizer recipes that are small enough to pop in your mouth but filling enough to keep you happy? The best part? They’re ridiculously easy. We’re talking easy quiche recipe level easy. Even if you’re not much of a baker, these will make you feel like you’ve got your act together. Keep a few on hand for school lunches, quick snacks, or late-night cravings. Trust me, these easy quiche recipes will quickly become part of your regular rotation.

Table of Contents
- 1) Key Takeaways
- 2) Easy Mini Quiche Recipe
- 3) Ingredients for Mini Quiche
- 4) How to Make Mini Quiche
- 5) Tips for Making Mini Quiche
- 6) Making Mini Quiche Ahead of Time
- 7) Storing Leftover Mini Quiche
- 8) Try these appetizers next!
- 9) Mini Quiche Recipe
- 10) Nutrition
1) Key Takeaways
- Mini quiche is quick to make, portable, and freezer friendly.
- You can change fillings depending on what you like or have at home.
- These healthy finger foods are perfect for parties or everyday snacking.
- They taste good warm, at room temperature, or reheated later.
2) Easy Mini Quiche Recipe
I like recipes that make me feel like I worked hard, even when I didn’t. This mini quiche is exactly that. It looks fancy, yet it’s as simple as whisking eggs and cutting dough. I’ve made them on quiet weekends, and I’ve also whipped up batches when I had guests coming with almost no notice. Both times, they worked out just fine. That’s why I call it my little kitchen lifesaver.
Mini quiche doubles as healthy finger foods when you want to impress without stress. People love having their own little bite, and I like that nobody fights over who gets the biggest slice. It’s already portioned. For me, that’s one less thing to worry about when I host.
The first time I made them, I worried about messing up the crust. But once I pressed the rounds into the tin, I realized they’re very forgiving. The filling hides any uneven edges, and when they come out golden and puffy, nobody notices small flaws. That’s what makes this recipe approachable and easy to repeat.

3) Ingredients for Mini Quiche
Refrigerated Pie Crusts: Store-bought pie crusts save time and work well. I roll them out, cut circles, and press them in. The edges don’t have to be perfect. They still bake up golden and flaky.
Eggs: Large eggs form the base of the filling. They bake into a tender bite that holds everything together. I use fresh eggs, since they whisk smoother and taste cleaner.
Half and Half: This adds richness and makes the filling creamy. I’ve tried milk, but the texture isn’t the same. Half and half balances flavor and lightness.
Salt and Pepper: Seasoning matters. Even with strong fillings like bacon or cheese, the eggs need their own boost. A small pinch goes a long way.
Bacon: Cooked and crumbled bacon adds smoky flavor. I keep extra for topping, since guests always notice when they see bacon peeking out.
Cheddar Cheese: Shredded cheddar melts smoothly and adds a sharp bite. It balances the eggs and makes each quiche satisfying.
Spinach: Fresh spinach brings color and freshness. It keeps the quiche from feeling too heavy and adds a nice contrast to the bacon.
Mushrooms: Chopped mushrooms add earthiness. They release moisture, so I sauté them before adding to keep the filling from getting soggy.
Nonstick Spray: A quick coat keeps everything from sticking. With mini tins, this step makes a big difference when removing quiches later.

4) How to Make Mini Quiche
Step 1. Preheat the oven to 375°F and spray the muffin tin. I like to get this done first so everything flows smoothly once I start filling.
Step 2. Roll out the pie crusts, cut circles, and press them into the cups. The dough stretches a little, so don’t worry if circles aren’t perfect. Once baked, they look neat.
Step 3. In a bowl, whisk eggs, half and half, salt, and pepper. The mixture should look smooth and pale yellow. That’s when I know it’s ready.
Step 4. Add a spoonful of bacon and cheese or spinach and mushrooms to each crust. I like mixing a few flavors so guests get a surprise.
Step 5. Pour the egg mixture into each cup, filling about three quarters. Any more, and it may spill as it bakes.
Step 6. Bake for around 20 minutes, until the tops puff and turn golden. I always check with a toothpick—if it comes out clean, they’re ready.
Step 7. Cool slightly before removing. They’re delicate when hot, but firm once cooled a few minutes.
Step 8. Serve warm or let cool fully to freeze. Both options work well, and I like knowing I’ve got a quick snack in the freezer.

5) Tips for Making Mini Quiche
I’ve learned small tricks after making these often. First, don’t skimp on greasing the tin. Even with crust, they like to stick. Second, precook watery veggies like mushrooms, so the filling stays firm. Third, mix up the fillings. Half bacon and cheese, half veggie, and everyone finds something they like.
Mini quiche is one of those healthy finger foods you can dress up or down. Swap bacon for sausage, or go with feta and roasted peppers. Every version has its charm, and none of them take much extra work.
If you’re making them for a party, bake them earlier in the day. Reheat before serving, and they’ll still taste fresh. Guests never guess they weren’t baked minutes before.
6) Making Mini Quiche Ahead of Time
I like to bake mini quiche a day ahead when I know I’ll be busy. They hold well in the fridge overnight, and the flavor deepens slightly. I store them in a sealed container so the crust stays flaky. They warm quickly in the oven the next day.
Another option is to freeze them. Once cooled, I line them up on a tray, freeze until solid, then move them into bags. That way, they don’t stick together. I’ve pulled out just a few at a time for quick snacks, and it feels like a smart move each time.
If you want to prep even earlier, you can cut the crusts and whisk the eggs, then keep both chilled. When it’s time, all you do is assemble and bake. It’s simple and makes hosting less stressful.
7) Storing Leftover Mini Quiche
Leftovers don’t last long here, but when they do, I store them in the fridge in airtight containers. They keep well for three to four days. To reheat, I use the oven instead of the microwave, since the oven brings back the crisp crust.
When frozen, they last up to two months. I like pulling one or two out at a time for quick breakfasts. They heat straight from frozen, though they taste best if thawed overnight in the fridge first.
I always smile when I find a bag of mini quiche waiting. It feels like I saved a gift for myself from past cooking.
8) Try these appetizers next!
9) Mini Quiche Recipe

Healthy Finger Foods Mini Quiche Recipe
Ingredients
- 1 package refrigerated pie crusts (2 crusts)
- 4 large eggs
- 1 cup half and half
- 1/2 teaspoon salt
- 1/4 teaspoon black pepper
- 3/4 cup cooked and crumbled bacon
- 3/4 cup shredded cheddar cheese
- 1/2 cup chopped fresh spinach
- 1/2 cup diced mushrooms
- Nonstick cooking spray
Instructions
- Preheat your oven to 375°F and lightly grease a mini muffin tin with nonstick spray.
- Roll out the pie crusts and cut circles with a round cutter. Press each circle into the muffin tin cups.
- In a bowl, whisk together eggs, half and half, salt, and pepper until smooth.
- Fill each crust with a spoonful of bacon and cheese, or spinach and mushrooms.
- Pour the egg mixture over the fillings, filling each cup about 3/4 full.
- Bake for 20-22 minutes until the centers are set and the tops are golden.
- Let them cool for a few minutes before gently removing from the tin.
- Serve warm, or cool completely and freeze for later.
10) Nutrition
Serving Size: 1 piece | Calories: 90 | Sugar: 0.6 g | Sodium: 135 mg | Fat: 6 g | Saturated Fat: 2.5 g | Carbohydrates: 5 g | Fiber: 0.3 g | Protein: 4 g | Cholesterol: 35 mg


Leave a Comment